If you use a telescope for astronomical observation or astrophotography, or a camera for night scenes, such as the aurorae, star trails, and the like, you must have experienced dew building up within an hour or less.
Why Dew Forms on Telescopes and Lenses
The reason dew forms, is that the telescope or camera lens parts, made from metal and glass, lose heat to the very frigid clear sky. After some time, the temperature of the telescope parts drops below the dew point. At this point, mositure from the air starts condensing on the optical elements, and your observing session comes to an end.
The dew point is related to the ambient temperature and relative humidity.
In order to prevent dew from forming, you to either insulate the surface that loses heat (such as Telrad when not looking through it), or you need to heat the optical elements constantly, so that they stay above the dew point.
You need to do this in a variable manner. You don't want to heat the optical elements too much, so as to cause tube currents, or turbulence. You also don't want to use more power than what is needed, especially when you are running on battery power.
Also, the amount of power needed will vary from one time in the night to another, depending on how the dew point changes as relative humidity increases, and the ambient temperature decreases. So you need to increase the power under those conditions.
The High Cost Of Astronomical Accessories
Anyone who is a serious amateur astronomers knows how expensive accessories can be. This is probably due to the hobby being a niche market, and hobbyists resigned to the fact that they need to pay more.
The cheapest dew controller that I could find online was USD $39, from the UK. Shipping is extra.
But it does not have to be this way, since you can build your own versions of some accessories.
A dew controller is one of them. And you can build it for less than $10!
Getting The Parts
The heart of the dew controller is a PWM dimmer. PWM stands for Pulse Width Modulation. This dimmer is used for LED lights, such as those used for holiday decorations.
- PWM Dimmer
Search eBay for "pwm dimmer". Here is an example for $2. - 5.5 x 2.1 mm Barrel Jack, Female
Search eBay for "5.5 x 2.1 jack female". Here is an example for $1. - RCA Female Socket, Panel Mount
Search eBay for "rca female socket panel". Here is an example for $1 - Four pieces of wire
The wires should be flexible. - Fridge box
This should be of a size that can accomodate the dimmer, but it should not be too loose inside. Available at the Dollar Store for a few dollars at most. - Some cardboard, or sturdy foam
This is used for padding of the PWM dimmer within the box
.
Total cost of material: $8 or less ...
Tools Needed
You will need the following tools:
- Exacto knife.
- Screw driver.
- Soldering iron.
- 12 volt, 2 ampere power supply.
This must have a 5.5 barrel jack, center positive - Heated Shield, or Heating Strip.
You can buy this from several places, or build your own using nichrome wire, or resistors.
Building Your Dew Controller
Make two holes on the sides of the fridge box. The holes should fit the barrel jack and the RCA jack.
Cut the wires to suitable length.
Solder the wires to the terminals of the Barrel and RCA jack
Stick the other ends of the wires into the screw terminals. Make sure that the long side of the barrel jack to the V- input of the PWM dimmer. The short side should go into V+ input. The outer side of the RCA should go to V- output. The center should go inot the V+ output.
Pad the PWM dimmer with cardboard or thick foam. After you have everything working, you can use hot glue or silicone to reduce its movement.
Make a hole in the cover of the box, at the place where the dimmer knob goes. Take the knob off gently, then close the box and re-attach the knob.
Finished Project
Here is how mine looks after it was fully assembled.
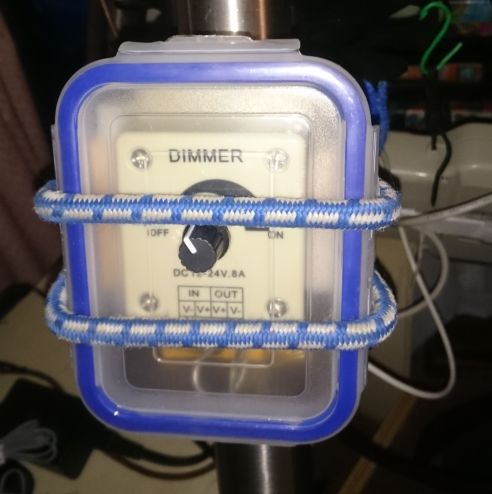
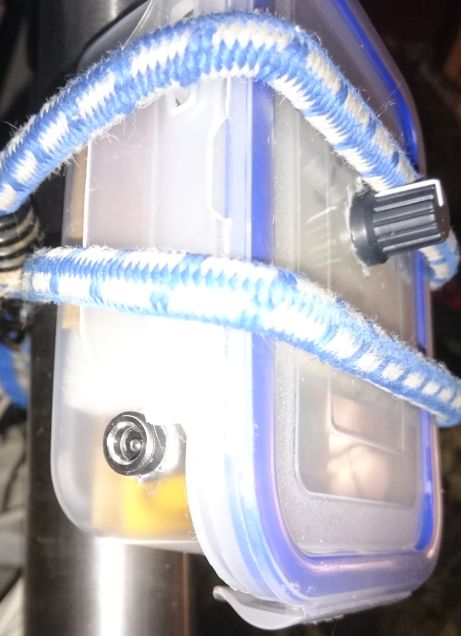
Overall view of the completed dew controller, mounted on the north tripod leg with a bungee chord:
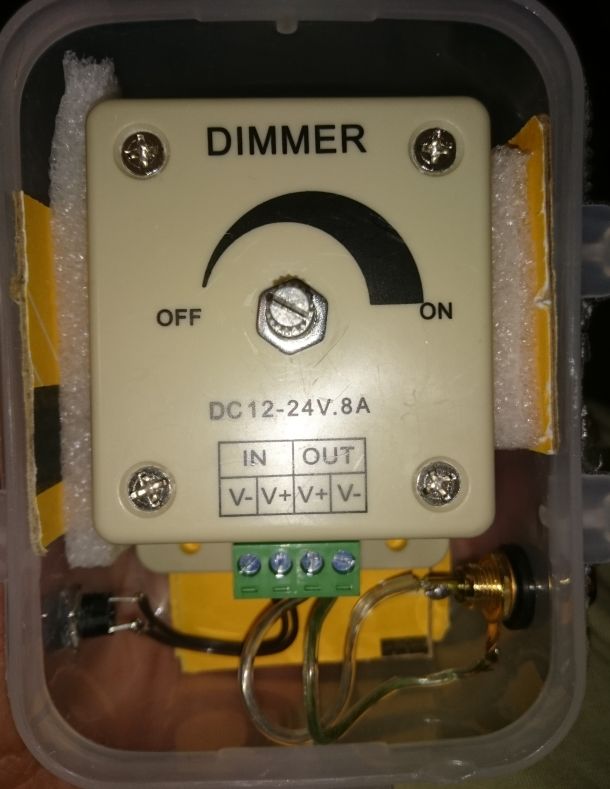
Inside view of the dew controller, showing the PWM dimmer, and the input and output power connections:
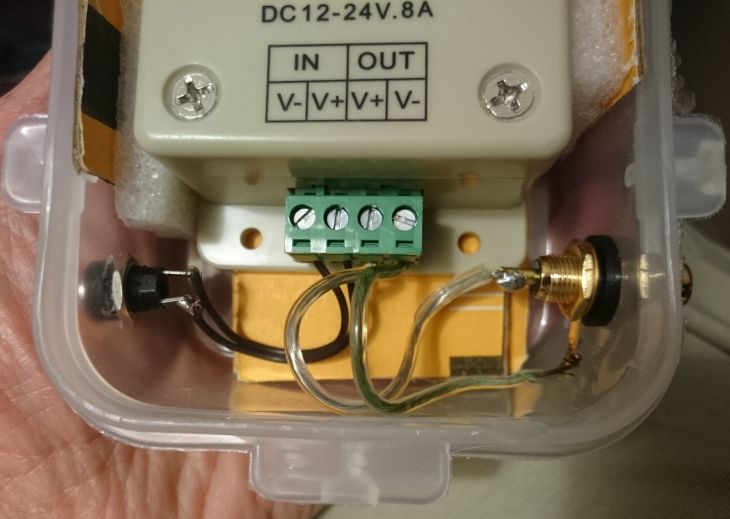
Inside view, showing the power connections more clearly:
Left side, with the RCA output connector, going to the dew shield:
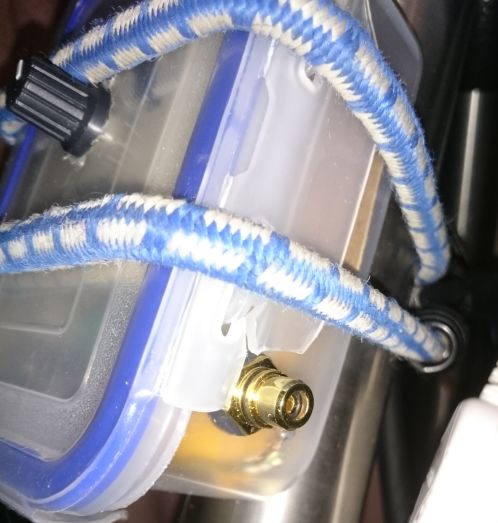
Right side, showing the input power jack:
Checking Your Circuits
Before and after you solder the wires, make sure you use a multimeter with continuity settings to test the circuits. So, positive on the 5.5 barrel jack to positive screw terminal of the PWM dimmer should beep. Likewise, the ground to ground for the same circuit. Do the same with the RCA jack and the respective screw terminals on the dimmer.
Testing Your Dew Controller
Plug in a 12V power supply to the 5.5 mm barrel jack, and a heated shield or heating strip to the RCA jack. Wait for several minutes, then measure the temperature of the heating element. You can use an Infra Red thermometer, another type of thermometer, or feel by hand.
To test that changing the knob does change the temperature, you will need a thermometer though. Set the knob to a quarter and see how many degrees above ambient it changes after several minutes, and stays at a certain temperature. Test the same for half, and three quarters, to get an idea of how many degrees above ambient each one pushes the dew strip to.
Now you have a dew controller that is simple and works.
Variations
If you want, you can add an RCA splitter (like this one on eBay for $1), and that way you can heat two components (e.g. the front element of your main telescope, and the front element of a guide telescope, or an eyepiece). Both will be controlled by the same knob though, so no individual temperature control.
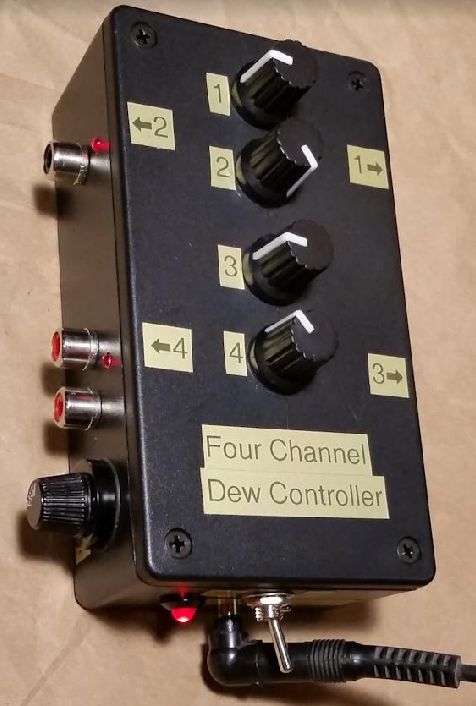
4-Channel Dew Controller
Or you can do what my friend Dave S did, and take the innards of the 4 PWM dimmers, and mount them in a box, and have a multichannel dew controller that way. Useful if you use another scope for autoguiding, with independent controls for each heating strip.
Total cost: $25.
Note that a commerical dual channel dew controller can be CAD $119 or CAD $134.99, plus shipping and taxes.
Here are pictures he sent me:
External view:
Internal view:

Microcontrollers
Another idea that I have is to use a small microcontroller, such as an Arduino Mini, and do the pulse width modulation based on input from ambient temperature, relative humidity (both measured by a The ambient temperature, and relative humidity are measured using a DHT22/AM2302 sensor), and the temperature of the heating strip (using a waterproof DS18B20 1-wire thermometer).
From those values, the dew point can be calculated using this approximation, every 5 or 10 seconds. Then, if the DS18B20 is lower than the calculated value, then pulsing of the heating strip is increased to raise the temperature until it is, say, 2 degrees above the calculated value.
This will make a dew controller on-par with the state of the art commercial offerings, such as the Dew Buster controller, which is US $240.
WiFi Microcontroller
One can also substitute an ESP8266 or ESP32 microcontroller, and check the dew point calculation every 5 or 10 seconds, as above.
The ambient temperature, and relative humidity are measured using a DHT22/AM2302 sensor, and the heating strip temperature is measured using a waterproof DS18B20 1-wire thermometer.
The calculated dew point, along with the above measurements, can all be displayed on a web page hosted on the microcontroller.
In addition to automatically raising the temperature by 2 degrees above the dew point, there can be buttons on the web page to increase or decrease the heating. This can all be monitored and controlled from a smart phone.
This will be more feature rich than the state of the art controllers mentioned above.
Most Comments
Most commented on articles ...